.

Showing posts with label blogger. Show all posts

Monday, 28 January 2013

mybloggertricks v2 like blogger responsive template

mybloggertricks v2 like new blogger responsive template
As ween seen on internet Mybloggertricks.com is one of the top blogging blog on the internet and in few past days mybloggertricks wear a new dress mean they are some up with a new responsive template which is very beautiful and responsive. we only say that it is beautiful but dont upsad i,m here with this new template
is it amazing? i know you are thinking that how can we cloned it but dont forget that it is a new era and everything is possible here so i,m going to tell you about that templates feature.

Features:

  • Seo optimized
  • beautiful menu
  • fixed slide bar
  • fixed width slide bar
  • fast loading
  • author box added
  • read more hack
  • complete social
  • Responsive template
  • back to top button
Now i,m going to give you the live demo of mybloggertricks clone template so you can easily understand its features.


Live Preview Click Here

Now here i,m going to give you template without any cost and full free but please keep visiting and kindly subscribe us for more latest hacks and widgets


Download Now Click Here

Thank you very much for visiting here keep visiting and find new templates and awesome widgets
Read More


Saturday, 26 January 2013

how to add meta tags for each post in blogger

Seo for blogger blog
Adding meta tags in blogger is really a best way to drive traffic from search engines and it really good for seo of your blog. but did you know that we can also add separate meta tags for each post. so each post has his own data in google search engine. meta tags are really important part in blogs because it tell search engines that what is in your blog post . it is really best for blog and it make our blog rank high in search engines. you can add keywords and description for each post in blogger.
So how to add this ?
you only have to follow my steps.

Steps:

  • Go to blogger
  • now goto template tab and edit html
  • Then find below line
<b:include data='blog' name='all-head-content'/>
  •  Now paste the below code just below the above tag
<b:if cond='data:blog.url == "http://www.haseebnet.blogspot.com/"'> <meta content='DESCRIPTION' name='description'/> <meta content='KEYWORDS' name='keywords'/> </b:if>
  • Now replace http://haseebnet.blogspot.com with your post url
  • Replace description with your post description
  • and replace keywords with your posts keywords 
  • And then save the template
It is really beautiful and awesome way to increase pretty traffic to your blog i hope you like it please share this with your friend and please keep visiting and find out more widgets
Read More


how to customize 404 page for blogger

Custom 404 pages for blogger
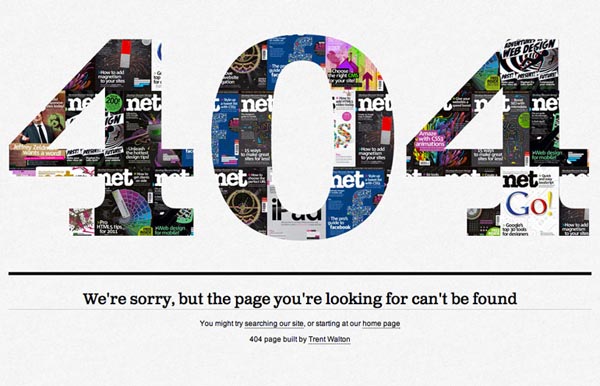
404, what the mean of 404 page not found its mean when user click on an invalid link or an expired link So your user will redirected to 404 error page. error pages have many type but in blogger the most common error page is 404 error page. Now a days you can see how many sites have their own beautiful 404 custom error pages. Today i will teach you that how to create an awesome 404 error page in blogger . it is not so hard but it is too easy to create a most beautiful page of your blog.

Importance to 404 page:

404 page is really important in blogs because if your user find and invalid link he think that this blog is full of expired links but if you have custom page then he think its just a typo mistake and he again reading your other posts.

creating a 404 error page in blogger:  

  • Goto blogger dashboard 
  • Then goto setting tab and click on search preferences 
  • then click custom page not found edit button
custom 404 page for blogger
  • Then paste below codes in it.
    404 page
    404 page
<style type="text/css" > body {background:white url('https://blogger.googleusercontent.com/img/b/R29vZ2xl/AVvXsEibIjmc7zQ5QcYu-ue0N0SuaYjQFYpjnYUXWn5cOC4mXk-sfK8R40UoNxkz8Q9EK9yR19JJX6gp8x969Kb_0hvf_ktsuTp3hP3FX6GwzppIl-rB3ItdR0k2rV_-j7wpHUl7vyqFNkSGZxE/s1600/404-not-found-page-24.jpg') 50% 0% no-repeat !important;z-index:10000000;} .sidebar, footer, .content, .header, .columns-inner, .footer-top {display:none;} body {min-width: 0px !important;} </style>

404 page
404 page
<style type="text/css" >
body {background:white url('https://blogger.googleusercontent.com/img/b/R29vZ2xl/AVvXsEgp0W2dFnW_07rRE10T9lJTFrh3FoI_J03xwekd9WXh1nN72KvesYikZWgueB2HkzTMU_Uzahj2CEEHwCQV74PgELr5xkM0lfCzTI7XTXFxrtNLcQhjUrumwhRK3L8DaedwNom3EL5qSUw/s640/404_6.jpg')  50% 0% no-repeat !important;z-index:10000000;}
.sidebar, footer, .content, .header, .columns-inner, .footer-top {display:none;}
body {min-width: 0px !important;}
</style>

  • Now save it and its done
Hope you like my post about customize 404 page please share it with your friends and keep visiting here to find new and awesome widgets
Read More


Friday, 25 January 2013

beautiful numbered page navigation for blogger blog


I recently Posted about characters and count tools for blogger  which my readers really like but some of them ask me about blogger widgets. Some ask me about seo and blogger templates but i decide to post about blogger widgets. Blogger widgets are playing an important role in designing of blogs . Making blog beautiful is a simple wish which nowadays every blogger had. But you are thinking that which one widget i,m going to share now, it is beautiful number page navigation for blogger which makes your blog very beautiful . you can watch live demo in below picture

beautiful numbered page navigation for blogger
you can also add this beautiful widget in blog this widget is really awesome and beautiful . page navigation is one of the most important part of blogger blog because your readers can engaged with your blog and it make ease to locate following posts which they are searching for . You can add this navigation bar really easy but its coding is pretty long so do not bored please and follow my steps to create this navigation bar :)

Installation:


  • Goto blogger dashboard
  • now goto  template tab and edit html
  • and click expands widget templates
  • now find ]]></b:skin> and paste below css just above  ]]></b:skin> tag.
.pagenavi{ position: relative; display: block; width: 400px; height: 40px; overflow: visible; margin: 50px auto; border: 10px solid rgba(255,255,255,0.5); /*border-radius*/ -webkit-border-radius: 40px; -moz-border-radius: 40px; border-radius: 40px; /*box-shadow*/ -webkit-box-shadow: inset 0 0 10px #fff,0 1px 0 #666,0 -1px 0 #fff; -moz-box-shadow: inset 0 0 10px #fff,0 1px 0 #666,0 -1px 0 #fff; box-shadow: inset 0 0 10px #fff,0 1px 0 #666,0 -1px 0 #fff; } .pagenavi span,.pagenavi a{ font: bold 20px/30px Tahoma, Arial; cursor: pointer; text-decoration: none; color: #464646; display: block; float: left; margin-left: 2px; /*box-shadow*/ -webkit-box-shadow: inset rgba(0,0,0,0.1) 0 1px 0, inset rgba(255,255,255,0.7) 0 2px 0, inset rgba(255,255,255,0.7) 0 -1px 0, inset rgba(255,255,255,0.7) 1px 0 0, inset rgba(255,255,255,0.7) -1px 0 0, rgba(0,0,0,0.3) 0 3px 0; -moz-box-shadow: inset rgba(0,0,0,0.1) 0 1px 0, inset rgba(255,255,255,0.7) 0 2px 0, inset rgba(255,255,255,0.7) 0 -1px 0, inset rgba(255,255,255,0.7) 1px 0 0, inset rgba(255,255,255,0.7) -1px 0 0, rgba(0,0,0,0.3) 0 3px 0; box-shadow: inset rgba(0,0,0,0.1) 0 1px 0, inset rgba(255,255,255,0.7) 0 2px 0, inset rgba(255,255,255,0.7) 0 -1px 0, inset rgba(255,255,255,0.7) 1px 0 0, inset rgba(255,255,255,0.7) -1px 0 0, rgba(0,0,0,0.3) 0 3px 0; padding: 2px 10px; min-width: 10px; text-align: center; position: relative; text-shadow: #fff 0 1px 0; background: #cdcdcd; background: -webkit-gradient(linear, 0% 0%, 0% 100%, from(rgba(255,255,255,0.8)), to(rgba(200,200,200,0.9))); /*linear-gradient*/ background: -webkit-gradient(linear,left top,left bottom,from(rgba(255,255,255,0.8)),to(rgba(200,200,200,0.9))); background: -webkit-linear-gradient(top, rgba(255,255,255,0.8), rgba(200,200,200,0.9)); background: -moz-linear-gradient(top, rgba(255,255,255,0.8), rgba(200,200,200,0.9)); background: -o-linear-gradient(top, rgba(255,255,255,0.8), rgba(200,200,200,0.9)); background: linear-gradient(top, rgba(255,255,255,0.8), rgba(200,200,200,0.9)); } .pagenavi a:after { content: ''; position: absolute; bottom: -3px; height: 100%; display: block; width: 100%; left: 0; /*box-shadow*/ -webkit-box-shadow: inset rgba(255,255,255,0.2) 1px 0 0, inset rgba(255,255,255,0.2) -1px 0 0, rgba(0,0,0,0.4) 0 1px 0; -moz-box-shadow: inset rgba(255,255,255,0.2) 1px 0 0, inset rgba(255,255,255,0.2) -1px 0 0, rgba(0,0,0,0.4) 0 1px 0; box-shadow: inset rgba(255,255,255,0.2) 1px 0 0, inset rgba(255,255,255,0.2) -1px 0 0, rgba(0,0,0,0.4) 0 1px 0; } .pagenavi a:first-child::after { /*border-radius*/ -webkit-border-radius: 500px 0 0 500px; -moz-border-radius: 500px 0 0 500px; border-radius: 500px 0 0 500px; } .pagenavi a:last-child::after { /*border-radius*/ -webkit-border-radius: 0 50px 50px 0; -moz-border-radius: 0 50px 50px 0; border-radius: 0 50px 50px 0; } .pagenavi a.current:after { height: 1px; bottom: -1px; } .pagenavi a:before { content: ''; position: absolute; top: 1px; height: 100%; /*box-shadow*/ -webkit-box-shadow: rgba(0,0,0,0.4) 0 3px 0; -moz-box-shadow: rgba(0,0,0,0.4) 0 3px 0; box-shadow: rgba(0,0,0,0.4) 0 3px 0; width: 1px; display: block; background: rgba(0,0,0,0.4); right: -1px; } .pagenavi a:last-child::before { display: none !important } .pagenavi a:first-child { /*border-radius*/ -webkit-border-radius: 50px 0 0 50px; -moz-border-radius: 50px 0 0 50px; border-radius: 50px 0 0 50px; font-family: 'WebSymbolsRegular'; } .pagenavi a:last-child { /*border-radius*/ -webkit-border-radius: 0 50px 50px 0; -moz-border-radius: 0 50px 50px 0; border-radius: 0 50px 50px 0; font-family: 'WebSymbolsRegular'; } .pagenavi a:hover { /*box-shadow*/ -webkit-box-shadow: inset rgba(0,0,0,0.1) 0 1px 0, inset rgba(255,255,255,0.7) 0 2px 0, inset rgba(255,255,255,0.7) 0 -1px 0, inset rgba(255,255,255,0.7) 1px 0 0, inset rgba(255,255,255,0.7) -1px 0 0, inset rgba(255,255,255,1) 0 0 15px, rgba(0,0,0,0.2) 0 3px 0; -moz-box-shadow: inset rgba(0,0,0,0.1) 0 1px 0, inset rgba(255,255,255,0.7) 0 2px 0, inset rgba(255,255,255,0.7) 0 -1px 0, inset rgba(255,255,255,0.7) 1px 0 0, inset rgba(255,255,255,0.7) -1px 0 0, inset rgba(255,255,255,1) 0 0 15px, rgba(0,0,0,0.2) 0 3px 0; box-shadow: inset rgba(0,0,0,0.1) 0 1px 0, inset rgba(255,255,255,0.7) 0 2px 0, inset rgba(255,255,255,0.7) 0 -1px 0, inset rgba(255,255,255,0.7) 1px 0 0, inset rgba(255,255,255,0.7) -1px 0 0, inset rgba(255,255,255,1) 0 0 15px, rgba(0,0,0,0.2) 0 3px 0; } .pagenavi a:active { /*box-shadow*/ -webkit-box-shadow: inset rgba(0,0,0,0.1) 0 1px 0, inset rgba(0,0,0,0.2) 1px 0 0px, inset rgba(0,0,0,0.2) -1px 0 0px, inset rgba(255,255,255,0.7) 0 2px 0, inset rgba(255,255,255,0.7) 0 -1px 0, inset rgba(0,0,0,0.1) 0 0 15px, rgba(0,0,0,0.2) 0 2px 0; -moz-box-shadow: inset rgba(0,0,0,0.1) 0 1px 0, inset rgba(0,0,0,0.2) 1px 0 0px, inset rgba(0,0,0,0.2) -1px 0 0px, inset rgba(255,255,255,0.7) 0 2px 0, inset rgba(255,255,255,0.7) 0 -1px 0, inset rgba(0,0,0,0.1) 0 0 15px, rgba(0,0,0,0.2) 0 2px 0; box-shadow: inset rgba(0,0,0,0.1) 0 1px 0, inset rgba(0,0,0,0.2) 1px 0 0px, inset rgba(0,0,0,0.2) -1px 0 0px, inset rgba(255,255,255,0.7) 0 2px 0, inset rgba(255,255,255,0.7) 0 -1px 0, inset rgba(0,0,0,0.1) 0 0 15px, rgba(0,0,0,0.2) 0 2px 0; top: 1px; text-shadow: #fff 0 0 15px; } .pagenavi a:active:after { bottom: -2px } .pagenavi a:active:before { /*box-shadow*/ -webkit-box-shadow: rgba(0,0,0,0.4) 0 3px 0; -moz-box-shadow: rgba(0,0,0,0.4) 0 3px 0; box-shadow: rgba(0,0,0,0.4) 0 3px 0; top: 0px; } .pagenavi a.current { /*box-shadow*/ -webkit-box-shadow: inset rgba(0,0,0,0.1) 0 1px 0, inset rgba(0,0,0,0.3) 1px 0 0px, inset rgba(0,0,0,0.3) -1px 0 0px, inset rgba(255,255,255,0.7) 0 2px 0, inset rgba(255,255,255,0.7) 0 -1px 0, inset rgba(0,0,0,0.1) 0 0 15px, rgba(0,0,0,0.3) 0 1px 0; -moz-box-shadow: inset rgba(0,0,0,0.1) 0 1px 0, inset rgba(0,0,0,0.3) 1px 0 0px, inset rgba(0,0,0,0.3) -1px 0 0px, inset rgba(255,255,255,0.7) 0 2px 0, inset rgba(255,255,255,0.7) 0 -1px 0, inset rgba(0,0,0,0.1) 0 0 15px, rgba(0,0,0,0.3) 0 1px 0; box-shadow: inset rgba(0,0,0,0.1) 0 1px 0, inset rgba(0,0,0,0.3) 1px 0 0px, inset rgba(0,0,0,0.3) -1px 0 0px, inset rgba(255,255,255,0.7) 0 2px 0, inset rgba(255,255,255,0.7) 0 -1px 0, inset rgba(0,0,0,0.1) 0 0 15px, rgba(0,0,0,0.3) 0 1px 0; top: 2px; text-shadow: #fff 0 0 15px; } .pagenavi a.current:before { /*box-shadow*/ -webkit-box-shadow: rgba(0,0,0,0.4) 0 3px 0; -moz-box-shadow: rgba(0,0,0,0.4) 0 3px 0; box-shadow: rgba(0,0,0,0.4) 0 3px 0; top: -1px; } .pagenavi a.current:active:after { bottom: -1px }
  • now find <b:widget id='Blog1' locked='true' title='Blog Posts' type='Blog'>
  • and paste below code just below the above tag
<b:includable id='page-navi'> <div class="pagenavi"> <script type="text/javascript"> var pageNaviConf = { perPage: 5, numPages: 6, firstText: "First", lastText: "Last", nextText: &quot;&#187;&quot;, prevText: &quot;&#171;&quot; } </script> <script type="text/javascript" src="http://rilwis.googlecode.com/svn/trunk/blogger/pagenavi.min.js"></script> <div class="clear" /> </div> </b:includable>
  • Now here's the final step find  
<!– navigation –>
<b:include name='nextprev'/>

  • And replace them with below code
<b:if cond='data:blog.pageType == "index"'>
<b:include name='page-navi' />
<b:else/>
<b:if cond='data:blog.pageType == "archive"'>
<b:include name='page-navi' />
</b:if>
</b:if>

  • Now save the template and its done
This widget is pretty cool but coding is pretty long also but it really make your blog beautiful i hope you like my post please share this with your friends and keep visiting to find more awesome widgets.

Read More


Thursday, 24 January 2013

characters and words counter tool for blogger

Word counter tool for blogger
Today i,m going to give you a tool with which you can count your post words mean you can count that how many words are in your post. This is very important for every blogger that he know about word counting it is one of the most important part of blogging many bloggers ignore this and they donot know about disadvantages of this. The calculation of meta discription which fits in google search engine results is 145 characters and the characters of title in google search engine results is 45 which is completely fits in results
so you can count your title and meta description characters with our word counter tool.

Character Counter Tool


Word counter tool

Hope you enjoy our post please share this with your friends and keep visiting daily for more tools.
Read More


social buttons with hover effect like labnol.org

Today i,m going to tell you that how to add a beautiful social networking buttons to your blogger blog. these networking buttons are inspired from labnol.org . social networking buttons are one of the best way to engaged your users and it will create a better relation of you with your readers
here's the live demo of social networking buttons and i also add link below with which you can easily take a view of social networking buttons.
Social networking buttons with hover effect


You can easily install this widget to your blogger blog and these buttons are really beautiful

Installation:

  • Goto blogger dashboard
  • now Goto page layout tab
  • Then add a gadget and select html/javascript
  • Now paste below code in it.
<style> /************************** Social Buttons from Haseebnet.blogspot.com *************************/ .haseebnetgotsocial {padding: 2em 0 1.5em 50px;} .haseebnetgotsocial span  a {display: block;width: 32px;height: 32px;text-indent: -9999px;background-color: none;background: transparent url("https://blogger.googleusercontent.com/img/b/R29vZ2xl/AVvXsEj2pLOHDMTPcwMEvmfEkAbCU7Athvyd47SYb9jJM_ZxP_JcLl-tEvQ5HCWNp3l10OUBLbkwiqbuTIr1iakD2nBm-dG2vEZ1H2hn-6piTk4A0SFr_yh-IjZivOGQrYc3TKQJS0yPQR5chzjm/s1600/socialbuttons.png") 0 0 no-repeat;} .haseebnetgotsocial span {float: left;display: inline;margin-right: 8px;}
#iconTwitter,#iconFacebook,#iconRSS,#iconYouTube,#iconGooglePlus {transition:background-position .4s ease-in-out;-webkit-transition:background-position .4s ease-in-out; -o-transition:background-position .4s ease-in-out; -moz-transition:background-position .4s ease-in-out; -ms-transition:background-position .4s ease-in-out;} 
#iconTwitter {background-position: -33px -33px;} #iconTwitter:hover {background-position: -33px 0;}
#iconFacebook {background-position: -66px -33px;} #iconFacebook:hover {background-position: -66px 0;}
#iconRSS {background-position: 0 -33px;} #iconRSS:hover {background-position: 0 0px;}
#iconYouTube {background-position: -99px -33px;} #iconYouTube:hover{background-position:-99px 0}
#iconGooglePlus {background-position: -132px -33px;} #iconGooglePlus:hover {background-position: -132px 0;}
.ads67 {border: 1px solid gainsboro;border-right-style: none;border-left-style: none;}

</style>
<div class="haseebnetgotsocial"> <span><a href="http://twitter.com/carelexxmalik" id="iconTwitter" target="_blank" title="Twitter: carelexx malik">Twitter</a></span> <span><a href="http://www.facebook.com/carelexxmallik" id="iconFacebook" target="_blank" title="Facebook: Carelexx malik">Facebook</a></span> <span><a href="http://feeds.feedburner.com/haseebnetwork" id="iconRSS" target="_blank" title="RSS Feed: haseebnet blog post feed">RSS</a></span> <span><a href="https://www.youtube.com/user/mrdevilkid63" id="iconYouTube" target="_blank" title="YouTube Channel: carelexx malik on youtube">YouTube</a></span> <span><a href="https://plus.google.com/108867173879409387931?rel=author" id="iconGooglePlus" target="_blank" title="Google Plus: haseeb malik">Google</a></span> </div>
  • Now kindly replace all yellow colored links with your links
  • Now save it and its done
I hope you like and enjoy my widgets and please keep visiting and if you have any question or feedback please comment below.
We love to hear from you

Read More


Wednesday, 23 January 2013

simple subscribe box below every post

In my previous posts i give you some beautiful social widgets for your blogs but you know blog is not complete without subscribe box . subscribe box is a widget you can use on sidebar and below post to attract visitors as a regular visitors the function of this box is that when your reader subscribe to you then whenever you publish a new post it will directly send to his inbox this is a benefit for which people add these subscribe box widgets to their blogs here the picture of that subscribe box and i also added live demo button so you can easily know more about this widget .
simple subscribe box below every post


You can add this box in your blog by follow my simple and easy steps .

Installation:

  • Goto blogger dashboard
  • Now goto template tab and edit html
  • Now expand widget templates
  • Then Find  <data:post.body/>
  • Now add below code just below the  <data:post.body/>
<style> /* Subcribe CSS */ .frm-stx-btm  {border:1px solid gainsboro ;padding-left:10px;overflow: hidden;background:#F0F0F0;} #email-ui {font-size:25px;margin:10px 0px; } .nam-subeml {display:inline;border:2px solid gainsboro;width:300px !important;height:30px;font-size:25px;color:grey;font-family:Arial, Helvetica, sans-serif;padding:0px 5px 5px 10px;} .nam-subeml:focus {color:black;border-color:#3AA3E9;outline:none; } .inl-9005 p {display:inline !important;} #ui63494 {width:160px;padding:2px;top:-3px;vertical-align:middle;position:relative;border:2px solid #2580D5;background-color:#1B89EE;font-family:"verdana";color:white;font-size:25px;} #ui63494:hover {background-color:#46A6FF; } </style> <div class="subscribe-stx"> <form action="http://feedburner.google.com/fb/a/mailverify" class="frm-stx-btm" method="post" onsubmit="window.open('http://feedburner.google.com/fb/a/mailverify?uri=haseebnetwork', 'popupwindow', 'scrollbars=yes,width=550,height=520');return true" target="popupwindow"> <div id="email-ui"> Subscribe with Email for updates</div> <div class="inl-9005"> <input class="nam-subeml" name="email" style="width: 140px;" type="text" /> <input id="ui015424" name="uri" type="hidden" value="haseebnetwork" /> <input id="ui03994" name="loc" type="hidden" value="en_US" /> <input id="ui63494" type="submit" value="Subscribe" /> </div> <div id="ui43524"> Get updates from <a href="http://feeds.feedburner.com/haseebnetwork" target="_blank">Haseebnet</a></div> </form> </div>

  • Now replace all Haseebnetwork with your feedburner username
  • And then Save your template.
If you enjoyed our post then please share it with your friends thank you and keep visiting.
Read More


beautiful facebook like button with rounded corner box

In my last post i told you about social widget like spiceupyourblog.com And readers like that post and request me to make another beautiful widget with facebook like button . So, i,m here with a new social widget with facebook like button you can also watch the live demo of widget and i added the picture of that widget below so you can easily understand the design of widget and i hope that you like my this widget . Now a days social sharing is every thing and you cant find a blog without social sharing buttons because with them you can gain a huge traffic to your blog.
Facebook like button in style with round corner box


you can add this beautiful widget in your blogs sidebar and it create special impression on your readers and attract them to like and click your blog. There is now loading effect of this widget on your blog so don't worry about your blogs speed and loading time and if you think that it will effect on your loading time then please red following article How to increase blog loading speed  .  Now i,m going to tell you that how to add this widget its simple and easy. here's we go.

installation:

  • goto blogger dashboard
  • Now goto page layout tab
  • and Then add a gadget
  • Now select html/javascript and paste below code in it .
<div style="-khtml-border-radius: 15px; -moz-border-radius: 15px; -webkit-border-radius: 15px; background-color: #ccc9f1; border-radius: 15px; border: 4px solid #f3e88e; padding: 10px;"> <img border="0" style="clear: left; float: left; margin-bottom: 1em; margin-right: 1em;" src="https://blogger.googleusercontent.com/img/b/R29vZ2xl/AVvXsEg0KI86J4HWsA-qSgrejKSjnV7JBq9-TxI9wDc4ecwIxrbWqNALBtArHZayyXz9_1EDjbB3X_WNn8yHWwdBeCjAGtmsINHeSFhXy7N0Y-zXY1HpUE5hNUyXPIXXhdoxBSP3bzD72QHRCsI/s1600/join.me-24work.blogspot.com.png" /><span style="color:#000099;">Join Our FaceBook Page To Stay With Us And Share Your Awesome Articles....</span><img src="https://blogger.googleusercontent.com/img/b/R29vZ2xl/AVvXsEgKtg5nRPqyeI92Dfc_4BmwwegtTWQV5U-s1EUMiENjdsuG7R4lS0xgt1v_EORqiBTyDs9ZyofIz8z4aP857t2iblucpkxUVEcUUauAvk2Y0_tS76Q4h89CFRpa2-tYtjoDKb8jVvimbaM/s1600/Moving-picture-right-pointing-finger-gif-animation.gif" /><iframe allowtransparency="true" frameborder="0" scrolling="no" src="http://www.facebook.com/plugins/like.php?href=https%3A%2F%2Fwww.facebook.com%2Fcarelexxmallik&amp;send=false&amp;layout=button_count&amp;width=80&amp; show_faces=false&amp;action=like&amp;colorscheme=light&amp;font&amp;height=21" style="border: none; height: 21px; overflow: hidden; width: 80px;"></iframe></div>
  • Now simply replace carelexxmallik with your facebook page username
  • Then save it and its done.
I hope you enjoy my post if you enjoyed then please share it with your friends and keep visiting daily for awesome new widgets
Read More


Tuesday, 22 January 2013

social widget like spiceupyourblog.com

Today i,m going to share a social widget which is used in spiceupyourblog.com . It is a beautiful widget with hover effect and when your cursor point on it, it rotates 360 degree and create a beautiful essence on your readers mind. This widget is created by the admin of spiceupyourblog.com . I just try to create a widget like that . Social widget is always the first choice of blogger because it bright your online presense and make you popular among peoples. Now watch the demo of the social widget below
Social widget for blogger


Without these widgets your blog not shine on the right way because these widgets are the main widgets So, wanna add this follow my steps.

Installation:

  • Goto blogger dashboard
  • now Goto layout tab
  • add a gadget and select html/javascript
  • Now paste below codes in the html/javascript box
<style> #social a:hover { background-color: transparent;opacity:0.7; } #social img { -moz-transition: all 0.8s ease-in-out; -webkit-transition: all 0.8s ease-in-out; -o-transition: all 0.8s ease-in-out; -ms-transition: all 0.8s ease-in-out; transition: all 0.8s ease-in-out; } #social img:hover { -moz-transform: rotate(360deg); -webkit-transform: rotate(360deg); -o-transform: rotate(360deg); -ms-transform: rotate(360deg); transform: rotate(360deg); } </style>  <div id="social"><a title="Grab Our Rss Feed" href="http://feeds.feedburner.com/haseebnetwork" target="_blank"><img border="0" src="https://blogger.googleusercontent.com/img/b/R29vZ2xl/AVvXsEh4LqZ2dkxKXqFKw7_dZLwuk2J5YxUTMHUhhyphenhyphentOnAO6yUfXCC5uhFpHMV_sRE_Gr3EP5KvulSMITn__Oauk8Gld9sf_DpjlrpTMwQ-YX0Mnu2IyP-Qd3WTTRxsfjlU9x8N4q5ZfsmG8XcV7/s1600/RSS-48x48.png" style="margin-right:1px;" alt="Icon"></a><a rel="nofollow" title="Get Free Updates Via Email" href="lovelykid.haseeb@gmail.com" target="_blank"><img border="0" src="https://blogger.googleusercontent.com/img/b/R29vZ2xl/AVvXsEgIQELAJKmsvleR7jUJDRMNlJEXKkMv0_eTya0bpnSNTC7FVIsDBAeo0fT6UrS-R-2XQn5mDy1a_5QKaHsVmvI3bpYGo8GtatN-D4oy4-IIF2Lk-Sp6VgypQL-rKln_3nhZRhHipZr_1iAk/s1600/RSS-EMAIL-48x48.png" style="margin-right:1px;" alt="Icon"></a><a rel="nofollow" title="Like Our Facebook Page" href="https://www.facebook.com/undefeatablewarrior" target="_blank"><img border="0" src="https://blogger.googleusercontent.com/img/b/R29vZ2xl/AVvXsEhPIRHs2JkHi0BypSiqLkXEAutoUe5A9ww3Il15VMdnHzxj4cDebEO4YtkVy5Dx7G6UGTUWVFe6-9OIBjfjunllQERuluU_EHyKN7UgTKjgQbrFQ_eyjSEVmJehYgo97japF-6SptaWhOx_/s1600/FACEBOOK-48x48.png" style="margin-right:1px;" alt="Icon"></a><a rel="nofollow" title="Follow Our Updates On Twitter" href="http://www.twitter.com/carelexxmalik" target="_blank"><img border="0" src="https://blogger.googleusercontent.com/img/b/R29vZ2xl/AVvXsEjTlmMdkmRsD-r2WD_p6yIVBfmGX7WHdl5jUQ8aVYiIMAQV4QQZ55kAyICAZ2nmtdv_XwaVxXdRXvlDEl-Sq0W5uvpVZHK7OQ0IRJdp9JJO2IAcIrDCrXmibzKlUl_i6Zb-gfu1SLeqNcRx/s1600/TWITTER-48x48.png" style="margin-right:1px;" alt="Icon"></a><a title="Follow Us On Google+" rel="nofollow" href="https://plus.google.com/" target="_blank"><img style="margin-right:1px;" src="https://blogger.googleusercontent.com/img/b/R29vZ2xl/AVvXsEh8PYcqeDPcn2WlddWB4d1nbAIQNfyJaIDW4RagmESZSvDRIbBR4cboxHC7H8qx7EEbMG9DO7g08F-k0LSAUgP_TjHFef5zUIzTyBN33cgg776zQcdXs6GyufLfJ1HjLppXNSz-48yVx0xf/s1600/GOOGLE-PLUS-48x48.png"></a><a title="Follow Our Pins" rel="nofollow" href="http://pinterest.com/carelexxmalik" target="_blank"><img style="margin-right:1px;" src="https://blogger.googleusercontent.com/img/b/R29vZ2xl/AVvXsEghQ_k-6jJM3Tbbt5PgP8j9k2G8V7LCwDnnvfhJ7BJB6pJ2aPntyNdkgjtEwuVdbTpoBQd-60ysrPUXsXvGLollshwI0Id_MUcZWZueTw8ex8RtgplFWGI3asH9g_KF3B9uZJQ0LXuXm04a/s1600/PINTEREST-48x48.png" alt="Follow Me on Pinterest"></a></div>
  • Now change all the links with your social links
  • Then save it and its done 
If you enjoy our widgets then please take a minute to share them with your friends and thank you for visiting our blog keep visiting daily and find new widgets.
Read More


hex colour code generator for blogger blog

Hex colour code generator
Today i,m going to tell you about hex colour code generator for blogger with which you can easily find colour codes for your blogger template customizations. this is a really cool and awesome flash widget it is based on a round shape rotating circle in which you can easily choose colour of your choice and put it it your blog.
Please select the colour and then click on it then you can see the colour code at right side of the widget i.e #FFFFFF, etc . just copy it and then paste it in the required place.
Please keep visiting for more widgets
Read More


Sunday, 20 January 2013

2 mashable like blogger templates

Today i,m going to give you 2 mashable like blogger templates .Mashable is one of the top blog in the world
but you know nowadays the mind of designers is not less then the mind of hackers because nowadays you can found many of clone templates of biggest site in the search. The templates which i,m going to give you are really beautiful and creative with all the widgets and social integrations these all templates are seo optimized and they have built in social buttons .now i,m going to tell you about these templates features

Features:

  • Seo optimized
  • fast loading
  • mashable sharing
  • social integration
  • beautiful menus
  • auto post thumbials
There are many other features in these templates but if i tell you all the features then you dont take interest in using it . So, watch demos and download.
Mash 1 blogger template
mashable like blogger template


View Live demo   Download

Mash2 blogger template


View Live Demo   Download Now


Download templates and be cool make them more beautiful and dont forget to comment here and keep visiting to find new templates
Read More


hackinguniversity like blogger template

Today i,m going to tell you that how to download hackinguniversity like blogger template for free . Hacking university is one of the best blog in India which is run by rishab jain who is best known for blogging tricks and tech tips. you can download our template by clicking button below


Features:

  • Seo optimized
  • comments, labels and archives are also optimized
  • beautiful subscribe box
  • Post separator 
  • Beautiful like box
  • clickable effects 
  • popular post widget

To Download:

Updated
Sorry friends i cant give you download link any more because owner of hacking university complained me. he also complain about me in DMCA .

Now download this template and be happy but dont forget to comment here and like us on facebook and also Keep visiting
Read More


Saturday, 19 January 2013

beautiful and simple about the author box below every post in blogger

Today i,m going to tell you that how to add beautiful author box below every post . author information is one of the best way to increase social media strategy .means it is a best widget in which you can add your social media profiles and you can add also about your self so peoples can know more about you .it make your post body more beautiful.
Widget Demo
About author below post
Installation
  • Goto blogger dashboard
  • then goto template tab and edit html
  • Now click expand widget template
  • Then find ]]></b:skin>
  • Now paste below code just above ]]></b:skin>
.author_info { float: right; width: 573px; padding: 10px; border: 1px solid #e0e0e0; margin-bottom: 15px; margin-top: 15px; background: #eee; } .author_info h3 { margin-bottom: 10px; } .author_photo { float: left; margin: 0 0 0 10px; } .author_photo img { margin-right: 10px; border: 1px solid #e0e0e0; }
  • Now search for <div class='post-footer-line post-footer-line-1'>
  • and paste below code just below <div class='post-footer-line post-footer-line-1'>


<b:if cond='data:blog.pageType == &quot;item&quot;'>
<div class='author_info'>
<div class='author_photo'>
<img alt='author' src='http://lh3.googleusercontent.com/-AEjwZp9w37s/UNSIMPc2PcI/AAAAAAAAA7M/JjHAI3AjFFI/h120/images.jpeg'/></div>
<h3>About the Author</h3> This article is written by: <b>YourName</b> - who has already written <b>30</b> articles for <a href='YOUR-BLOG-URL'>YOUR-BLOG-NAME</a> YourName is a professional web designer. Catch him on <a href='http://twitter.com/yourtwitterID'>Twitter</a>, <a href='Your Facebook URL'>Facebook</a> or <a href='your e mail ID'>email</a> him <br> </br> <br> </br>
YourName&#39;s <a href='your web url'>Website</a><br style='clear:both;'/>
</div>
</b:if>


  • Now make some changes as where suitable and save the template
  • Its all done
 If you like my post kindly share it with your friends
Read More


Friday, 18 January 2013

Google followers box for blogger New

Google Plus
Google Plus
Social media is on the peak of internet nowadays and it is one of the most trending topic in which all of us are involved. Today almost every person is addicted of social networking. If we use it correctly we can gain highest traffic to our blog .Google plus is also one of the top social network in the list. google plus recently launched google plus followers box it completely work like facebook like box . So, in this way you can increase your google plus followers. you just have to put this follower box in your sidebar or Any suitable place and then wait peoples automatically attract people toward itself . Now i,m going to tell you that how to add it in your blog
First Watch its demo

Installation:

  • Goto blogger dashboard
  • goto page layout tab and add a gadget
  • now select html/javascript
  • Now paste below code in it
<div class="g-plus" data-action="followers" data-height="300" data-href="https://plus.google.com/100775406963584849560" data-source="blogger:blog:followers" data-width="300"> </div> <script type="text/javascript">       (function() {         window.___gcfg = {'lang': 'en'};         var po = document.createElement('script');         po.type = 'text/javascript';         po.async = true;         po.src = 'https://apis.google.com/js/plusone.js';         var s = document.getElementsByTagName('script')[0];         s.parentNode.insertBefore(po, s);       })();     </script>

  • Now just change Red colour code with your google plus page url
  • And then Save It and its Done
Now you have a beautiful google followers box Keep visiting and Find awesome widgets for your blogs

Read More


Wednesday, 16 January 2013

Optimize blogger comments archives and labels for better seo

Optimize blogger comments archives and labels for better seo
Seo is one of the best And important part of bloggers life because your blog is nothing without Seo. Seo means search engine optimization with which your blog can entered into search engines result. Same like this meta tags are also important for blog.  today i,m going to tell you that how to optimized your comments, archives, And labels in blogger blog .every blogger must know about seo and about their customization .
Now i,m going to tell you that how to optimize archives, labels and comments.

How to optimize comments :

Comments are very Good and best way to increase your blog ranking if you have good comments then it help you to increase your blogs rank but if those comments are not good and irrelevant then it totally destroy you ranking in search engines . So, the best way to optimized your comments for search engines The you must keep your comments external links No-follow . Follow me to make your comments links no-follow.
  • Goto blogger 
  • Edit html and find
expr:href='data:post.createLinkUrl'

  • Now replace above code with below code
rel='external nofollow' expr:href='data:post.createLinkUrl' 
Save your templates and its Complete

How to optimize Labels: 

Labels are also an important part of blogs we use them for better navigation and with the help of these labels user easily find the category in which he want to go. But they create much problems for search engine crawlers so then they also Optimized for search engines ranking.
  • goto blogger
  • edit html and find 
<a expr:href='data:label.url'

  • Now replace above code with below code
<a expr:href='data:label.url' rel='tag' 
Save your templates and its Complete.

 How to optimize Archives: 

Archives is also a problem for search robots . if achives pages are present in home they create huge problem for crawler robots do, if you want to get rid of this problem then follow mine steps
  • goto blogger
  • edit html and find
<a class='post-count-link' expr:href='data:i.url'>
  • now replace above code with below code
<a rel="archives" class='post-count-link' expr:href='data:i.url'> 
Save your templates and its Complete
Now your blog is completely optimized for search engines Visit daily To find more Seo tips
Read More


Tuesday, 15 January 2013

Dazzling blogger responsive template SEO optimized

Today i,m going to tell you about new blogger responsive template with fully SEO optimized so you can easily use it as your default template. It is best blogger template for your blog because it has all those feature which you want in your premium template . Because now a days these features are only available in premium blogger templates. It has right sidebar in which you can add your sponsered ads and a beautiful expandable search box with beautiful effects. The main feature of this blog is sticky floating menu bar which is floating when you scroll down or up .Now i,m going to tell you about features And giving you a demo link of blog where you can see the live demo of this template

Demo: 

Features:

  • Fast Loading
  • css3 labels
  • Thumbials related post widget
  • Ads below header
  • floating sticky menu
  • SEO optimized
  • Right sidebar
  • 4 coloumn footer
  • Expandable search box

Download:

Customizations:

This template is created by Templateism.com which is runned by syed faizan ali. For more customization Please visit templateism
Read More


Monday, 14 January 2013

beautiful css animated menu for blogger


Today we are going to discuss about navigation menus in blogger . Navigation menu is one of the most important part of our blog, because with this our readers can find pages they want i.e contact us, feedback us, etc And if menu is animated then reader cant wait to click on it . creating a beautiful menu is not hard in these days but make it compatible with all major is browser is one of the question on these menus. But we are giving you the most beautiful menu for your blog and website the one more thing is that it is also work with html site so you can use it in both . It is a beautiful menu with animation effect and there is no effect of it on your blogs loading time because there is no jquery used in it. It is created with pure css So be free to use it in your blog . Now i,m going to tell you that how to add this beautiful css menu in your blogger blog but first you have to check its demo so you can easily take decision of adding it.
Some Previous posts about menu's:

Installation:

  1. Goto blogger and select your blog in which you want to add menu
  2. now select layout tab and add a gadget 
  3. The select html/javascript and paste below Code in it .
<style type="text/css">
.exespotlightmenu{
width: 100%;
overflow:hidden;
}
.exespotlightmenu ul{
margin: 0;
padding: 0;
font: bold 14px Verdana; /* font style and size */
list-style-type: none;
text-align: center; /* "left", "center", or "right" align menu */
}
.exespotlightmenu li{
display: inline-block;
position:relative;
padding: 5px;
margin: 0;
margin-right: 5px; /* right margin between menu items */
}
.exespotlightmenu li a{
display:inline-block;
padding: 5px;
min-width:50px; /* horizontal diameter of spotlight */
height:50px; /* vertical diameter of spotlight */
text-decoration: none;
color: black;
margin: 0 auto;
overflow:hidden;
-moz-transition: all 0.5s ease-in-out; /* CSS3 transition to animate all A properties */
-webkit-transition: all 0.3s ease-in-out;
-o-transition: all 0.3s ease-in-out;
-moz-transition: all 0.3s ease-in-out;
-ms-transition: all 0.3s ease-in-out;
transition: all 0.3s ease-in-out;
}
.exespotlightmenu li:hover a{
color: white;
background: #a71b15; /* background color of spotlight */
-webkit-border-radius: 50%; /* large radius to create circular borders */
-moz-border-radius: 50%;
border-radius: 50%;
}
.exespotlightmenu li a exespan{
position:relative;
top:35%; /* move text down so it appears centered within menu item */
}
</style>
<div class="exespotlightmenu">
<ul>
<li><a href="##########"><exespan>Home</exespan></a></li>
<li><a href="##########"><exespan>About</exespan></a></li>
<li><a href="##########"><exespan>Portfolio</exespan></a></li>
<li><a href="##########"><exespan>Privacy</exespan></a></li>
<li><a href="##########"><exespan>Contact Us</exespan></a></li>
</ul>
</div>

 Now Replace RED colour to your desire text And replace ######## with your desire link
Thank you very much for visiting my blog hope you like it if Yes then please share it with your friends
Read More


Sunday, 13 January 2013

Powerful seo meta tags for blogger (new)

Meta tags All in one Pack

Today we are discussing about SEO and Meta tags in blogger and we are going to tell you the method about adding meta tags with a new way with which your blog can enter in search engines results. Mean meta tags are the gate of search engines, If your meta tags are configured correctly then your posts are on the top in search results . They are used to provide additional information about your blog to search engines.
To get better SEO results use Effectfull keywords because google also search keywords in blogs .
Follow my steps to add All in one Seo meta tags In blogger.

Installation:

1. Login to your blogger account
2. Edit html and Find 
<title><data:blog.pageTitle/></title>
3. Now replace it with following code
<b:if cond='data:blog.pageType == &quot;index&quot;'>
    <title><data:blog.pageTitle/> - Blogger widgets, templates, wordpress expert.</title>
    <b:else/>
    <title><data:blog.pageName/> | Haseeb.net </title>
    </b:if>
4. Now replace blue colour with your blogs seo friendly name and replace red colour code with your seo friendly keywords.
Now you have seo friendly page OR post Thankyou for visiting my blog 
Read More


Saturday, 12 January 2013

fast loading css social widget for blogger

fast Css social widget
fast Css social widget 
hi every one you know social networking is a great way to gain traffic for your blog and and it increase you SEO and you get 1000 of backlinks for your blog. Today i,m going to tell you that how to add beautiful and fast loading css social widget . it is user friendly and it is compatible with major browsers i,m writting about its compatibility in next paragraph

Browsers compatibility:

browsers compatibility  is a main issues of new widgets but this widget work with these browsers
  • Google chrome 14 and 14+
  • firefox 4 and +
  • safari 4 and +
  • opera 10 and +
  • I.E 8 and +
you can also watch live demo of our social widget and then you can easily take decision of adding it .

Installation 

1. Goto your blogger account > Dashboard
2. Now click on Expand template widget check box
3. Now find <div class=’post-footer-line post-footer-line-1'> tag
4. And then paste below code just below the <div class=’post-footer-line post-footer-line-1'> 


<style type="text/css">
.container {
  margin: 0px auto;
  width: 300px;
  text-align: center;
}

.share-btn {
  display: inline-block;
  vertical-align: top;
  position: relative;
  margin: 0 5px;
  padding-top: 40px;
  width: 75px;
  font-weight: bold;
  text-align: center;
  text-decoration: none;
  border-radius: 8px;
  -webkit-box-shadow: 0 2px 2px rgba(0, 0, 0, 0.2);
  box-shadow: 0 2px 2px rgba(0, 0, 0, 0.2);
}

.share-btn:active {
  margin-top: 3px;
}

.share-btn:active .share-btn-action {
  padding-bottom: 3px;
  -webkit-box-shadow: inset 0 -3px rgba(0, 0, 0, 0.15), inset 0 -1px rgba(0, 0, 0, 0.15);
  box-shadow: inset 0 -3px rgba(0, 0, 0, 0.15), inset 0 -1px rgba(0, 0, 0, 0.15);
}

.share-btn:active .share-btn-action:after {
  bottom: 3px;
}

.share-btn-count {
  position: absolute;
  top: 0;
  left: 0;
  right: 0;
  line-height: 40px;
  font-size: 19px;
  letter-spacing: -1px;
  color: #555;
  text-shadow: 0 1px white;
  background: #e6eff5;
  border-width: 1px 1px 0;
  border-style: solid;
  border-color: #c5c5c5 #bbb;
  border-radius: 8px 8px 0 0;
  background-image: -webkit-linear-gradient(top, rgba(0, 0, 0, 0.03) 0%, transparent 40%);
  background-image: -moz-linear-gradient(top, rgba(0, 0, 0, 0.03) 0%, transparent 40%);
  background-image: -o-linear-gradient(top, rgba(0, 0, 0, 0.03) 0%, transparent 40%);
  background-image: linear-gradient(to bottom, rgba(0, 0, 0, 0.03) 0%, transparent 40%);
  -webkit-box-shadow: inset 0 1px rgba(255, 255, 255, 0.5), 0 1px rgba(0, 0, 0, 0.18), 0 2px rgba(0, 0, 0, 0.07);
  box-shadow: inset 0 1px rgba(255, 255, 255, 0.5), 0 1px rgba(0, 0, 0, 0.18), 0 2px rgba(0, 0, 0, 0.07);
}

.share-btn-count:before, .share-btn-count:after {
  content: '';
  position: absolute;
  top: 100%;
  left: 50%;
  margin-left: -6px;
  border: 6px solid transparent;
  border-top-color: #e6eff5;
}


.share-btn-count:before {
  margin-left: -7px;
  margin-top: 1px;
  border-width: 7px;
  border-top-color: rgba(0, 0, 0, 0.07);
}


.share-btn-action {
  display: block;
  position: relative;
  line-height: 32px;
  padding: 2px 0 6px;
  font-size: 14px;
  color: white;
  text-shadow: 0 1px 1px rgba(0, 0, 0, 0.4);
  border: solid rgba(0, 0, 0, 0.18);
  border-width: 0 1px;
  border-radius: 0 0 8px 8px;
}


.share-btn-action:after {
  content: '';
  position: absolute;
  top: 0;
  bottom: 6px;
  left: 0;
  right: 0;
  border-radius: 0 0 6px 6px;
  -webkit-box-shadow: inset 0 -1px 2px rgba(255, 255, 255, 0.25);
  box-shadow: inset 0 -1px 2px rgba(255, 255, 255, 0.25);
}


.share-btn-tweet {
  background: #83cfe8;
  background-image: -webkit-linear-gradient(top, #83cfe8, #6ebbd4);
  background-image: -moz-linear-gradient(top, #83cfe8, #6ebbd4);
  background-image: -o-linear-gradient(top, #83cfe8, #6ebbd4);
  background-image: linear-gradient(to bottom, #83cfe8, #6ebbd4);
  -webkit-box-shadow: inset 0 -6px rgba(0, 0, 0, 0.16), inset 0 -1px rgba(0, 0, 0, 0.15);
  box-shadow: inset 0 -6px rgba(0, 0, 0, 0.16), inset 0 -1px rgba(0, 0, 0, 0.15);
}


.share-btn-tweet:after {
  -webkit-box-shadow: inset 0 -1px 2px rgba(255, 255, 255, 0.5);
  box-shadow: inset 0 -1px 2px rgba(255, 255, 255, 0.5);
}


.share-btn-tweet + .share-btn-count {
  -webkit-box-shadow: inset 0 1px rgba(255, 255, 255, 0.5), 0 1px rgba(0, 0, 0, 0.12), 0 2px rgba(0, 0, 0, 0.04);
  box-shadow: inset 0 1px rgba(255, 255, 255, 0.5), 0 1px rgba(0, 0, 0, 0.12), 0 2px rgba(0, 0, 0, 0.04);
}


.share-btn-like {
  background: #6480bd;
  background-image: -webkit-linear-gradient(top, #6480bd, #3c5894);
  background-image: -moz-linear-gradient(top, #6480bd, #3c5894);
  background-image: -o-linear-gradient(top, #6480bd, #3c5894);
  background-image: linear-gradient(to bottom, #6480bd, #3c5894);
  -webkit-box-shadow: inset 0 -6px rgba(0, 0, 0, 0.15), inset 0 -1px rgba(0, 0, 0, 0.2);
  box-shadow: inset 0 -6px rgba(0, 0, 0, 0.15), inset 0 -1px rgba(0, 0, 0, 0.2);
}


.share-btn-plus {
  background: #626262;
  background-image: -webkit-linear-gradient(top, #626262, #404040);
  background-image: -moz-linear-gradient(top, #626262, #404040);
  background-image: -o-linear-gradient(top, #626262, #404040);
  background-image: linear-gradient(to bottom, #626262, #404040);
  -webkit-box-shadow: inset 0 -6px rgba(0, 0, 0, 0.08), inset 0 -1px rgba(0, 0, 0, 0.3);
  box-shadow: inset 0 -6px rgba(0, 0, 0, 0.08), inset 0 -1px rgba(0, 0, 0, 0.3);
}

</style>

<div class="container">
     <a href='https://twitter.com/TechnologyTweak' rel='nofollow' target='_blank' title='Find us on twitter' class='share-btn'>
      <span class="share-btn-action share-btn-tweet">twitter</span>
      <span class="share-btn-count">400+</span>
    </a>

    <a href='https://www.facebook.com/Technononimous' rel='nofollow' target='_blank' title='Find us on facebook' class='share-btn'>
      <span class="share-btn-action share-btn-like">facebook</span>
      <span class="share-btn-count">500+</span>
    </a>

    <a href="https://plus.google.com/115574597696558279166" class="share-btn" target="_blank" rel="author" title='Find us on google+'>
      <span class="share-btn-action share-btn-plus">google+</span>
      <span class="share-btn-count">200+</span>
    </a>
</div>
5. now replace the links with your links
6. Now save it and its done
Note if you like my post then please share it with friends
Read More


© Copyright 2012, Template style of Haseeb malik - Design by Haseeb malik.